Monday, 10 November 2008

Ready to De-Mould, well almost


I filled the mould

To get the most real looking and accurate surface I did two things.
-Stippling in paraffin wax onto areas of the mould surface adds small random areas of damage.
-A loose powdering of the mould meant that the top surface should be a shiny aluminium appearance.

mixing a ration of 100g resin(coloured white) to 75g aluminium powder to 75g iron powder,
In totally the mould required around 450g of resin. If my plans are correct, the dusted aluminium will give a shiny top surface, and where the wax will be removed will reveal the lower darker surface...Hopefully making the key appear very authentic.

De mould tomorrow morning, was going to do it today, but temperature was very cold and resin was catalysing very slowly. So didn't want to rush and risk it deforming....

Sunday, 9 November 2008

LED workings


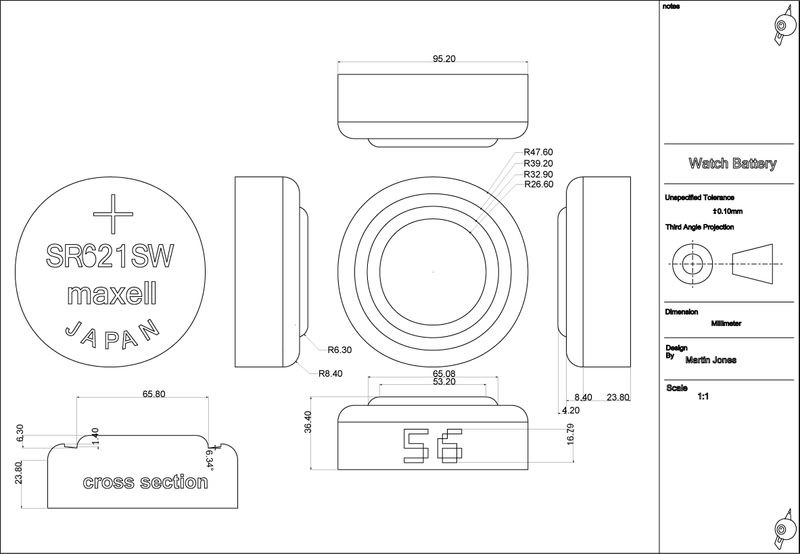
To make the LED/watch battery device work I acquired some battery powered put lamps.
After opening them I removed the switch and replace it with 'Sub-Miniature Lever Micro switch'.

This will be inserted into the watch battery and when the object is placed on the ground the 14:1 scale LED will light up. Acting as a type of emergency camping light.

Saturday, 8 November 2008

Key Mould Part 4

De-Mould the Fibre Glass


De moulded the fibre glass and removed the former for the key, there were 2 little problems but they were easily over come. Before pouring the second half of the silicone I re polished one side of the key. In doing this I must have rubbed away the releasing agent in some area's and the two parts fused together. But they were scalpled apart and the mould was un damaged.

--There was one section where the silicone did not catalyse compeltely, there must have been something on the key to in hibit it, but never found out what.


Cleaned out the mould with some fast cast, and the surface is very good. On monday I will cast with polyester resin and metal powders.

Battery Update
Also turned all the componets for the battery, details will be lazer cut on monday, hopefully lacqured by the end of the day.....

Wednesday, 5 November 2008

Moulding The Key Part 3

Removing the wall


The styrene base was removed and all the clay cleaned away. At this stage I noticed a small flaws.

The pour hole is partly fibre glass, and I will be pouring resin with metal powder into this.
----> Solution, I will only be pouring to top up the mould, and with a huge amount of release agent it shouldn't be a problem. Also a quick paint of silicone might be possible.

More Silicone


Another clay wall to hold the second side of the silicone, this was then backed up with 2 layers of fibre glass. Will be de moulded tomorrow, the current weather being rather could has mean the fibre glass is catalysing more slowly. This has slowed down the moulding process but will be very useful when it come to casting from it.

L.E.D materials

Received Transil 40 and optic clear 31 from mould life, this means the LED can now be moulded.

-Just ordered the TRIA inks required, with luck resin tests should be possible by Monday......perhaps even a finished LED....

Monday, 3 November 2008

Key mould progress

Moulding the Key part 2


The was sunken into a piece of styrene plastic to create the split line, the locators were made by filling ice cube trays with fast cast. When the fast cast is almost cured de mould them early and they can be bent into various shapes. A clay wall was added with key cut around the edge, which was then filled with silicone.


Clay hemispheres added to form more locators and then the flange was coated in a layer of acrylic spray lacquer to lock away any moister. Once dry a coat of j-wax was used to prevent the fibre glass from sticking to the styrene. This side has now had two layers of green fibre glass added to it, and tomorrow the second half of the silicone will be added.

L-E-D, update

Ordered from mould life the Optic clear 31 and the Transil 40, this will be used to mould and cast the head of the LED. Still looking for a good source of TRIA inks

-Apprenetly the bottled liquid inks are beinmg replaced by cartradges, which is maknig my application harder to acheive, they were to be used to add the colour to the clear poly urathane.

Monday, 27 October 2008

Painted Effect


Tested a different way to add the metal effect.
Spraying with black cellulose paint and then added metal powder while still wet.

Tried covering the test panel and sprinkling to test differences.
Gave some interesting effects, but the less dense the powder the harder it was to sprinkle.

Tried, brass, bronze, iron and aluminium....
Aluminium was the best overall, but the rest all have their own qualities but I wouldn't use this as an alternative to resin cast metal powders.

Might be useful when adding weathering or random details....

Sunday, 26 October 2008

Key Mould


Purpose
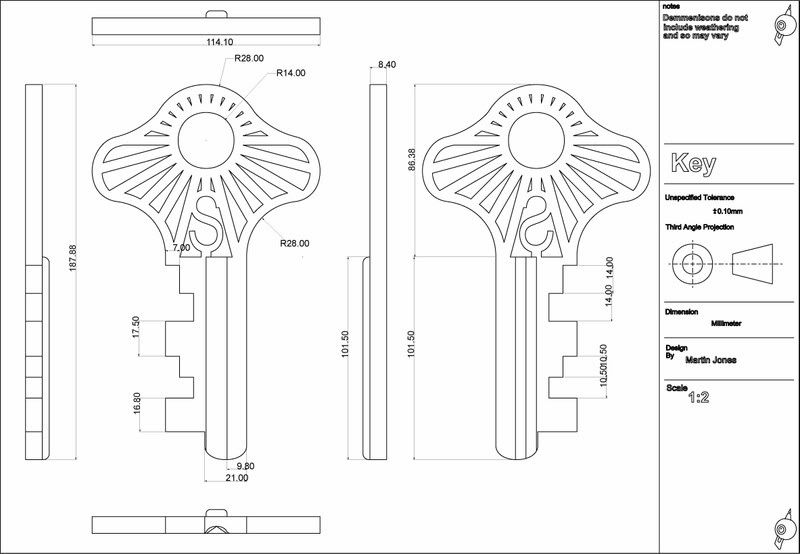
The key will be cast in metal powder with resin, it will consist of two parts and a small poor hole. With the quantities of metal powder I wish to use it will make the resins to viscous to poor, but with an open mould it can be brushed into key area's. Once near full the mould will be closed then topped up via the poor hole to ensure it is free of air voids.

1) Using a sheet of plastic (laser cut to shape) with locators added will be placed around the edge at the highest point where a split line can easily be removed. A clay wall will be added with various keys cut so it can locate to the fibre glass later. Silicone will be poured over to a thickness of 10mm, when near catalysed long cube like locator will be added to prevent the mould wall sinking in later.

2) Once fully catalysed clay wall is removed and fibre glass (or mod rock) jacket is added to strengthen the mould.

3) Mould is then flipped over and all plastic and excess material removed. New clay wall is made with keys and locators. A small object is added which will layer become the poor hole. Poor second half of silicone.

4) Remove all clay, and added the second half of the fibre glass jacket, remembering to added adequate release agent where fibre glass touches. Once catalysed drill holes for M6 bolt every 30mm around the edge.

Top image shows how the mould will look when open.
Detail shows how top locators will be pinned with metal rod to prevent the wall from sinking. This is an overly cautious method, but it will insure the surface of the key will not be warped when mould is moved.