Thursday, 18 December 2008

Photo's

Here are some final Images of the LED's and Key.


Saturday, 29 November 2008

And its finished

Well The project is finished......


(Above) This is the best image so far of the back pack, better ones are on the way...Manages to get finished before deadline with an hour to spare and play about the studio in my equipment.

The magnet I ordered wasn't powerful enough to hold the Key, but any more Iron in the casting mixture would have effected the colour. There are much more powerful magnets available but in the interest of safety I decided against using one. The harness I weaved worked well, and was strapped togeather with large staples. But the finish on the 'K' was slightly rushed for deadline.... I will re visit it later to respray.....

The Best part.....


Here is a nice photograph of one of may lamps. I find the scale to be most pleasing, I would like to produce one at 1:1 using the real objects to test how convincing this version is....

All that is left to do is my critique which I am planning this very second...... Better photographs will appear soon.......

-thanks

Tuesday, 25 November 2008

Nearing The Finish...

Object Updates.....With originals

1) Key


Overtime, the aluminium has dulled slightly, so just before my critique next week a polish is in order.... But overall this object have been very successful...

2) Watch Battery


I've had quite a bit of practise with aluminium metal powders, but these are by far the best. results. The only problem I have been finding is slight blemishes where the resin is perhaps not mixed perfectly. If there's time a few more will be cast to remove the slight marble effect on some of the edges. The main discovery is that Gel coat isn't not recommended, its viscosity means less metal powder can be used dulling its effectiveness.
"original at the bottom is hard to see".

3) L.E.D's


These have proven difficult, due mainly to the end line approaching (Friday).

->My first cast (Red) had an odd surface blemish which looks like an odd vein like ripple effect. It was probably due to the resin thickness and the heat it would have been holding. This was easily sanded away but more polish is require to achieve translucency. (also some air was trapped around the filiment).

--> My Second Cast (Green)In order to cut down this ripple effect, I mixed the poly urethane coloured it then added to the mould and degassed them together. This was left overnight to cure naturally without heat, then baked at 60 degrees to finished the curing. It was blemish free but there were air bubble at the bottom of the mould.

---> My Third and Final Cast (Yellow) this time, The resin was not degassed in the mould but seperately and the resin was cured at 30 degress for 3 hours (instead of 60 for 1 hour) This is now been left in the oven to cool overnight. On inspection this cast looked very sucessful (will post again tomorrow)

4) Weaving + Letter K

The 'k' has been cut out and built (also learnt to sue the router today to add even chamfer) ready for final details and spraying.

Modified my weave types am running tests to see how bleaching will change the threads whiteness to appear more cotton like.

5) Final thoughts and plan

Wednesday - LED's finished and attached to watch battery, 'K' primed at least
Thursday - Spray K Yellow, Darked matt yellow, then lightened sparked satin yellow, final coat of a tinted yellow gloss... Begin assembly.
friday - final assembly and well earned Pint...or five...

Saturday, 22 November 2008

Battery Completed


Here's an image of the battery from start to finish.
1) Nice silicone moulds
2) Straight out of the mould
3) Tidied Up
4) Polished.....

The battery worked very well, usually you need to burnish back resin with iron wool to gain the metallic finish but it was unnecessary. I found that the key things to remember when using metal powders is that.

1- The master should be polished to a very high standard (near mirror like), either lacquered or turned from a plastic or metal.
2- Resin Gel coated should be used, standard laying up resin works much better, you can have a higher ratio of metal powder to resin and will thicken to a gel coat standard because of it. Giving you a better metal effect.
3- Added a greenish off-white pigment to the resin give the aluminium that something extra...

Other objects

LED - Internal filaments have been made from acrylic and have been sprayed and lacquered. Ready for mould on monday morening.
Letter K - Basic shape has been cut ready to be sanded and shaped.

Saturday, 15 November 2008

Moulds and Clear Cast 31

Finished polishing..... finally


The battery has been moulded, (moulds above) and have been poured ready to cast on Monday.
The idea for the batteries is to cast them in fibre glass with a metal powder gel coat.
--Decision being, what when I made the key the highly polished surface lent its shininess to the aluminium powder. Gaining a better aluminium look..... So these formers where polished even better than the key was....

Optic Clear 31


Using some left over blanks for acrylic eyes I made this test mould for the optic clear 31 using transil silicone.

Using about 16g of resin each and 1 drop of the tria inks I got the test above. With only 1 problem. Where what looks like air bubbles have formed with an odd gas like pattern around them. The only thing I think might have caused this is some kind of forign chemical. So after cleaning the mould with alcohol I recast them. The problem was reduced but still slughtly visable.

Have now filled moulds with fast cast to try and remove anything left in the moulds. Other than that the colour is looking amazing......

Wednesday, 12 November 2008

Battery / Weaving Update

Battery Is almost ready to mould.....


The lathed battery parts had laser cut detail added. The text in the real object would have been stamped, so with any luck during the spraying stage the edges will become slightly filled producing a mild radius.

They have been sprayed with 5 layers of Cellulose lacquered near flawlessly.... The only flaw was major and in the final coat. On the last stroke I added to much and it pooled in one area..... This area will now required more time to set giving me another day to wait till I can polish them....... Damn it......

-------Was taught to make samurai sandals today, forgot the correct Japanese name, but will add later....Very useful in my weaving techniques possibility of modifying the design to make some sort of binding cords for my LED's to Batteries...

Tuesday, 11 November 2008

Pulled Key and moulded L--E--D


Here is the key, it turned out better than I thought it would, and OK in other ways.
They effect I managed to get with the aluminium worked very very well.
--It polished up very nicely to a shiny finish giving me the idea to not chrome the watch batteries and to try this....

My test objects never polished this well many dude to there surface. the key however was lacquered and polished to a high degree.


Poured the mould for the LED, used 450 grams of expensive platinum silicone to make it, as well as a few sample moulds. The silicone is clear designed for casting toys, using a clear cup to make the mould wall means I can still see the object inside.......

In 24 hours the coloured resin can begin.... wahahahaha

Monday, 10 November 2008

Ready to De-Mould, well almost


I filled the mould

To get the most real looking and accurate surface I did two things.
-Stippling in paraffin wax onto areas of the mould surface adds small random areas of damage.
-A loose powdering of the mould meant that the top surface should be a shiny aluminium appearance.

mixing a ration of 100g resin(coloured white) to 75g aluminium powder to 75g iron powder,
In totally the mould required around 450g of resin. If my plans are correct, the dusted aluminium will give a shiny top surface, and where the wax will be removed will reveal the lower darker surface...Hopefully making the key appear very authentic.

De mould tomorrow morning, was going to do it today, but temperature was very cold and resin was catalysing very slowly. So didn't want to rush and risk it deforming....

Sunday, 9 November 2008

LED workings


To make the LED/watch battery device work I acquired some battery powered put lamps.
After opening them I removed the switch and replace it with 'Sub-Miniature Lever Micro switch'.

This will be inserted into the watch battery and when the object is placed on the ground the 14:1 scale LED will light up. Acting as a type of emergency camping light.

Saturday, 8 November 2008

Key Mould Part 4

De-Mould the Fibre Glass


De moulded the fibre glass and removed the former for the key, there were 2 little problems but they were easily over come. Before pouring the second half of the silicone I re polished one side of the key. In doing this I must have rubbed away the releasing agent in some area's and the two parts fused together. But they were scalpled apart and the mould was un damaged.

--There was one section where the silicone did not catalyse compeltely, there must have been something on the key to in hibit it, but never found out what.


Cleaned out the mould with some fast cast, and the surface is very good. On monday I will cast with polyester resin and metal powders.

Battery Update
Also turned all the componets for the battery, details will be lazer cut on monday, hopefully lacqured by the end of the day.....

Wednesday, 5 November 2008

Moulding The Key Part 3

Removing the wall


The styrene base was removed and all the clay cleaned away. At this stage I noticed a small flaws.

The pour hole is partly fibre glass, and I will be pouring resin with metal powder into this.
----> Solution, I will only be pouring to top up the mould, and with a huge amount of release agent it shouldn't be a problem. Also a quick paint of silicone might be possible.

More Silicone


Another clay wall to hold the second side of the silicone, this was then backed up with 2 layers of fibre glass. Will be de moulded tomorrow, the current weather being rather could has mean the fibre glass is catalysing more slowly. This has slowed down the moulding process but will be very useful when it come to casting from it.

L.E.D materials

Received Transil 40 and optic clear 31 from mould life, this means the LED can now be moulded.

-Just ordered the TRIA inks required, with luck resin tests should be possible by Monday......perhaps even a finished LED....

Monday, 3 November 2008

Key mould progress

Moulding the Key part 2


The was sunken into a piece of styrene plastic to create the split line, the locators were made by filling ice cube trays with fast cast. When the fast cast is almost cured de mould them early and they can be bent into various shapes. A clay wall was added with key cut around the edge, which was then filled with silicone.


Clay hemispheres added to form more locators and then the flange was coated in a layer of acrylic spray lacquer to lock away any moister. Once dry a coat of j-wax was used to prevent the fibre glass from sticking to the styrene. This side has now had two layers of green fibre glass added to it, and tomorrow the second half of the silicone will be added.

L-E-D, update

Ordered from mould life the Optic clear 31 and the Transil 40, this will be used to mould and cast the head of the LED. Still looking for a good source of TRIA inks

-Apprenetly the bottled liquid inks are beinmg replaced by cartradges, which is maknig my application harder to acheive, they were to be used to add the colour to the clear poly urathane.

Monday, 27 October 2008

Painted Effect


Tested a different way to add the metal effect.
Spraying with black cellulose paint and then added metal powder while still wet.

Tried covering the test panel and sprinkling to test differences.
Gave some interesting effects, but the less dense the powder the harder it was to sprinkle.

Tried, brass, bronze, iron and aluminium....
Aluminium was the best overall, but the rest all have their own qualities but I wouldn't use this as an alternative to resin cast metal powders.

Might be useful when adding weathering or random details....

Sunday, 26 October 2008

Key Mould


Purpose
The key will be cast in metal powder with resin, it will consist of two parts and a small poor hole. With the quantities of metal powder I wish to use it will make the resins to viscous to poor, but with an open mould it can be brushed into key area's. Once near full the mould will be closed then topped up via the poor hole to ensure it is free of air voids.

1) Using a sheet of plastic (laser cut to shape) with locators added will be placed around the edge at the highest point where a split line can easily be removed. A clay wall will be added with various keys cut so it can locate to the fibre glass later. Silicone will be poured over to a thickness of 10mm, when near catalysed long cube like locator will be added to prevent the mould wall sinking in later.

2) Once fully catalysed clay wall is removed and fibre glass (or mod rock) jacket is added to strengthen the mould.

3) Mould is then flipped over and all plastic and excess material removed. New clay wall is made with keys and locators. A small object is added which will layer become the poor hole. Poor second half of silicone.

4) Remove all clay, and added the second half of the fibre glass jacket, remembering to added adequate release agent where fibre glass touches. Once catalysed drill holes for M6 bolt every 30mm around the edge.

Top image shows how the mould will look when open.
Detail shows how top locators will be pinned with metal rod to prevent the wall from sinking. This is an overly cautious method, but it will insure the surface of the key will not be warped when mould is moved.

Friday, 24 October 2008

Shiny Formers


Key
Finished and filled, there's something every model maker needs to learn and that's when to stop, being too particular will take for ever. The key has been given several layers of clear cellulose lacquer in a slight speckle. After 2 days to cure this will be polished back to give a good surface to mould from. The area's that are hard to polish will remain textured from the spray, mimicking the randomness of the stamped metal effect.

Fact -I discovered that to give a beaten affect to an object, brush and stipple wax into the mould. This is what was done on Gladiator so a single mould could be used to produce many helmet with different variations of damage....

LED
First post for the LED, turned on the lathe from chemi-wood, to an amazing finish then lacquered same as the key, and after a few days will be polished using T-cut to make a glass like surface. (also a few layers of Mirror Wax will maker the surface better and easier to de mould)

Contacted Mould life and Alchemy,

Alchemy's advice.
-3660 clear urethane slow, would be best for my LED casting with TRIA inks for the colour, costing £33.15 for the kilo kit. But still need to research the mould required, some urethane reactions are inhibited by tin cure silicones. May need a platinum silicone.

Mould Life advice
-Optic clear 31, mould life are particularly reliable when it comes to advice, and I have used their poly optics before. Will cost around £42 for the smallest kit and will require a Tinsel 40 mould costing around £30. Using TRIA inks for the colour.

ATM - cost is the main concern.....so it hangs on the 3660 mould requirements. TRIA inks cost around £5 a colour.....

CASTING ADVICE
-When using TRIA red ink into clear urethanes, always make it darker than you want when mixing, they lighten up when they curing
-Using standard urethane pigments with 3660 make it loose its transparency.

Weaving
In the image above I tested making a new weaving needle, meaning I could weave 3 stitches at the same time. This did not work, so back to one at a time.

-Note added new link to the giant magnetic letter I will be making.....

Sunday, 19 October 2008

Object Update

Weaving

With the new new board now filled, and with 2 and a half balls of twine gone, it takes roughly 6ish hours to complete just over a meter of cotton ribbon @ 14:1..


In to total the strap has 1442 stitches, which is now quite a scary thought, I have to make about 5 of these....

The Key
With it now sprayed and major details completed, it should be ready for moulding by Wednesday. All there is to do is refine some of the details and make some sharper edges.
-The mould will be made in two parts with the seam running along the top edge of the key making flashing easier to remove. With a nice mix of aluminium and iron powder a nice steal looking key will be produced with magnetic properties, making it attract to the back pack.


Things left to do

- Watch battery, still need to find some brass, copper or aluminium. No luck so far, if all else fails they will require a similar cold casting method, but without the preferred chrome effect.
-Decide what to cast LED from, currently considering clear fast cast from either alchemy or mould life.
-Need good large scale printers with flexible plastic capabilities

Note - added LED plans to links....

Wednesday, 15 October 2008

Weaving

Waeving

The various clothe that borrowers would be able to obtain would be mainly cheaper and most probably synthetic. Using a sample of cotton ribbon the plan was to scale up the material and its weaving pattern.


1. (using a sample as reference I experimented with weaving methods to best mimic the real thing) first test using string and card, this worked but the card was to flimsy meaning the weave could not be as tight as required. Once finished and removed from the board the pattern soon perished.

2. A thick laser cut board was then made, it was cut in half down the centre and a then glued back together. this was done so it could easily be dissembled later (so the weave could be removed intact). Also various tools were made from metal rod so that the weaving speed could be improve.

3.With the acrylics strength a thicker cord was used and a much better tighter weaving, but am limited by the boards length. discovered that with the weave touching the back of the board each stitch made it tighter making it harder to work with, so it needs to be raised from the back.

4. A meter and a half length board with wooden peg spacers was then made. Each peg is unglued, with a notch half way down, so the weave is made above the backboard. I can now spend my evening weaving the require amount of borrower material.

--Also Added new link list of plans and drawings---

Monday, 13 October 2008

Plans, materials and spray test

Spray testing

Continued experimenting with the ability to spray a convincing metallic surface.


Tested the following...
-Chrome plasti-kote spray, with cellulose lacquer and acrylic lacquer.
-aluminium metal powder resign sprayed - with with cellulose lacquer and acrylic lacquer.

So far, they all look metallic, but all retain that plastic like appearance, this kind of spray may not be useful.

Material Testing


Using samples of cord and ribbon, larger scales of weave were produced, using string to represent the thread. This was hand made to represent the fibres at the borrower scale.
worked very well, but the thickness may need to be increased to make a truer representation.

Using various plastics (bin liners), these were melted together to form plastic at the borrower scale, overall the plastic became around 2mm thick, this will be used in test to better understand possible ways of working with plastic at borrower scale.

The Plans are as follows

-Clothe, will be hand made from threads/rope etc.
-LED, cast in clear cast with metal interior components.
-Watch battery, hand made, from either aluminium, or chemi-wood with a metal spray application.
-Magnetic latter, made from wood or cheap acrylic (depends on weight) , then sprayed to mimic plastic.
-Key, laser cut from acrylic, hand finished and damaged then cast in resin with metal powder.
-Clasps and clips, made from steal to mimic staples.
-Various pockets, made from large scale prints onto plastics.
-Button (as time permits) turned, then airbrushed to a plastic effect.

Sunday, 12 October 2008

More Designs - and material descisions


Current Design

Several changes made so far, the back pack has become a magnetic letter mimic a more of a climbing harness. only issue is the available reference object only has a single magnet would prefer at least two making its use more practice.

Test and Source's

Pockets
- made from enlarged plastics.
- Need to find large scale printing with adequate plastic properties.
- Custom made plastic samples could be easily produced.

Magnetic Letter
- magnetic back pack
- reference has very very slight translucency, shall this be ignored (would light act in similar way at the required scale?)
-Test sprays on various materials is needed.

Straps
-Need to source real life objects as reference.
-Perhaps find 14:1 equivalent of thread, and make on straps though means of plating and weaving.
-Colour, perhaps dyed?

Watch battery
-to gain shininess, either hand made from steal or aluminium, or cast then chrome dipped.
-could be costly....

Saturday, 11 October 2008

Filling and Damage

Filling the key


The last few days have been spent continuing the designs of the back pack, and filling in the key. Once up to a near perfect standard the process of ageing will begin.

Time to age


Using enlarged photographs of the original unseen scratches and scrapes were revealed. This was then divided into a grid and sketched onto the model.
-Next I will be dremmling out these area's to mimic the keys used appearance.

Tuesday, 7 October 2008

The 'Key' Thing

KEY

Today I began making the shape for the 14/1 scale key.


Made from various layers of laser cut acrylic, now begins the time consuming part of adding the imperfections. Using blown up photo's of the original I will try to add all the marks of age to this copy.

Monday, 6 October 2008

Design and research update

New Links Added new set of links to the right, this includes all the important sites visited for various research needs.

Magnets

1) Powdered magnet research,
found various you tube videos of Super magnet man, a US supplier of magnets which includes a good looking powder variety. Although in theory this should be possible to cast into resin, I've sent off a few emails asking for information and possible samples to test this materials abilities.

2) UK magnets
Found a cheap UK based mag
net company, if powdered version proves unsuccessful these could be easily put inside moulds to give areas of magnetism.

Design


This is the current look of the design. Breakdown as follows
-Magnetic letter backpack, useful for quick storage and access to metallic tools.
--Will be an exercise in product model making, textures and spraying.
-LED / Watch battery lamp, for the lighting of dark areas.
--Will be produced in multiple colours, casting, vac-forms and possibility of working electronics.
-Large button, act as button.
--Will allow me to airbrush and test detailed colour matching.
-Back Pouch, made from basic lightweight household plastics.
--Large scale digital printing, examples of how the size of the printing rosette's will form as the scale increases.
-Straps and materials, to hold things together.
--Will improve various material skills, also may have to experiment with scaled up thread, etc.
-Pin and staples, to hold different items together.
--various metal working involved.
-Key (not shown) to open borrowed lock
--Example of hard edge metallic objects

Tomorrow

Method of producing key decided, will layer up from laser cut cross-sections, then hand make details, will require slight mill work. Plans ready to cut.....

Saturday, 4 October 2008

Deciding, with Iron and Magnets

I've been thinking

Decisions have been made, and I have decided on what objects to produce and that each of them will contain specific important skills.

  • Metal key, illiterates basic hard edge making with various machining skills. Plus metal powder casting and weathering effects.
  • Camping lamps, working electronics (as time permits) clear/transparent casting techniques. ability to make multiple replicas and vac-formed plastics.
  • Back pack, Will be made from various materials, allows for experimentation representing plastic objects and their imperfections, through sculpting and spraying techniques. Also allows other objects to be displayed as a costume type piece.

Magnets

One of my more favoured idea's is the backpack is made from a half plastic coating magnet. This meaning all the tools and equipment could be easily interchanged while out 'borrowing things".

Thinking on this, giant magnets are heavy and expensive. Tests were produce to see how much iron powder is required to obtain a useful magnetic effect.

#

1

2

3

4

5

6

7

Resin (g)

20

20

20

20

20

20

20

Aluminium Pwd (g)

20

10

5

20

10

20

0

Iron Pwd (g)

0

10

15

10

20

20

20


--anything above 10g of iron made the resin affected by a magnet, but the iron makes a large effect on the colour of the metal.

Research is required to see if magnetic powder is a possibility in order to produce a large prop which still can be hollow and light. But a magnets physical structure is important for the magnetism. So it may not be overly successful.

Thursday, 2 October 2008

Sketches and Maquette's


Various sketches produced today.


This quick (ish) Marquette was produced to test material capabilities. This was made at 1:1 scale from a borrowers perspective using found materials. The plastic was cut into strips and woven into cords the pack consists of stitched card.

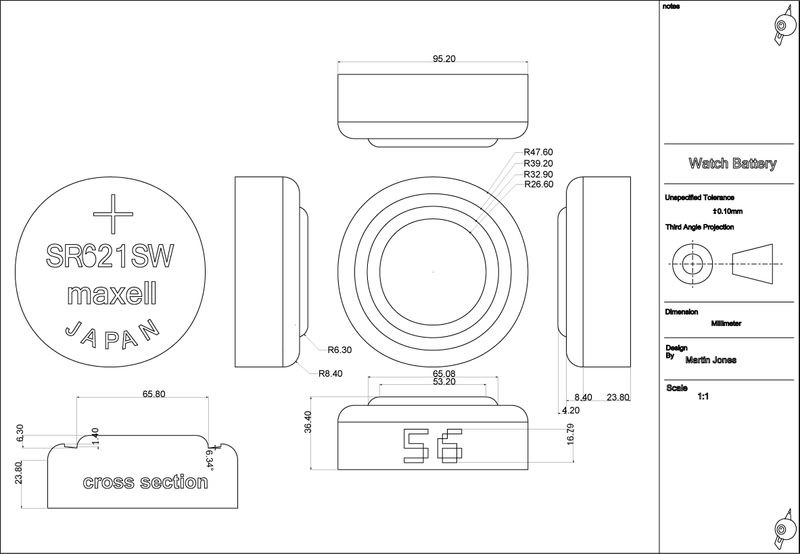
This was made to illustrate that borrower object should reflect what the majority of what household produced are made from.
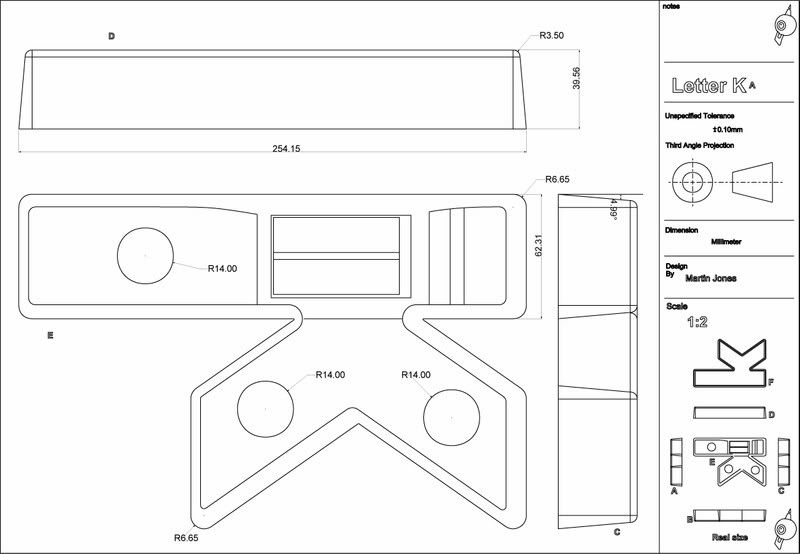
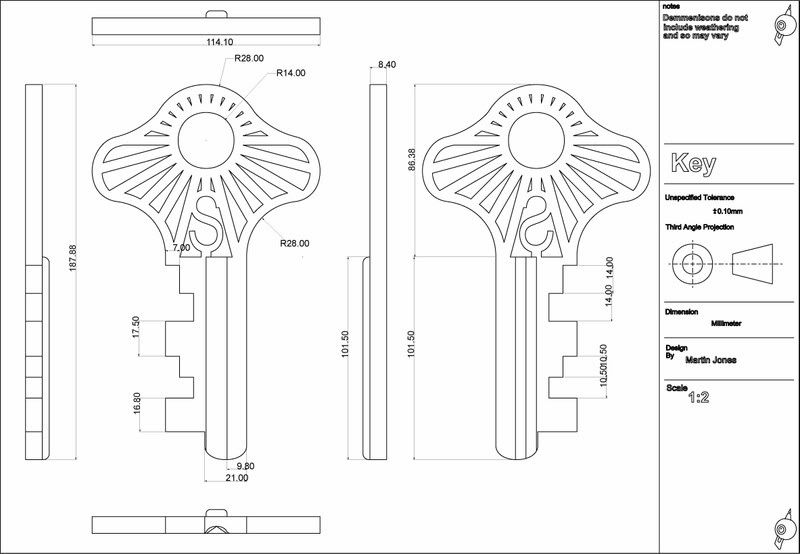
Tools continued

Still in decision mode on what object could be required, borrowers predominately use basic survival gear with slight modifications to suit our environment. So far what I think may be useful are.....

  • Grapnel Hooks (to reach high places).
  • Various ropes and climbing gear.
  • Rope or cord ladders.
  • Basic weapon (spider defence).
  • Zip line
  • Torch or freighting.
  • Glider?
  • Ice axe type of multi tool.
  • Back pack or satchels.
  • Something to hold water.
  • Map bag
  • First aid kit
  • Climbing shoes / claws
  • Magnets or suction tools
  • Key (from borrowed pad lock)


Wednesday, 1 October 2008

Dangers, Tools and Materials


Dangers of being a House Dwelling Borrower.

  • Spiders and insects, these would probably be one of the most scariest things they would come across being possibly poisonous. Some sort of weapon may be required. (Left, scale showing average house spider compared to average borrower)
  • Mice and rats, more like wolves but twice as deadly.
  • Humans, some sort of camouflage would be required, very little use for brightly coloured clothing or equipment.
  • Size restrictions, some kind of climbing gear would be required, various clips and pulleys, most surfaces are polished or are shiny, so conventional rock gear would useless. (possibly suckers, grapnel hooks etc.)
Required Tools for House Hold Terrain Negotiation

Storage - Some kind of bag will be required, necessary for supplies, tool and equipment. Would bags be back pack, overarm duffel bag, various pockets belts?

Pots and Pans - Would eating utensils be hand made or the use of a found object, i.e.. smarties lid?


Lighting - Borrowers rarely leave their home for more than a day, but just in case some kind of lantern would be required. Also cupboards can be dark when looking for food etc. Would they include candles? Basic Electronic lights? Fuel?


Telescope - Being very small, seeing longs distance's would be useful, some makeshift binocular would be used.


Climbing Equipment - The complexities, would they be basic rope, or some kind on harness equipped with pulleys? What about spiked shoes for added grip when climbing vertically?


Clips and fastenings? - All equipment needs to be secured together, what would be used? Hand made from wire and string? Or cannibalised from dolls or toys?

Maps - Would borrowers keep maps and diagrams of where important or useful thing can be found?

Fire - if fire is useful you matches or gas lighters be used?


>>> Full list of Image Based Research can be found in the links on the right <<<< All above image source from Costwold outdoor equipment supplier (www.cotswoldoutdoor.com)

Available Materials

Borrowers wouldn't use the same materials as we would, being a race of scavengers they would use found materials which are readily available.
  • Basic clothe would be too heavy and hard to move in, silks and nettings would be preferred.
  • Our would be made predominately from plastics would be mirrored in borrower culture. Plastics from packaging would be light, flexible and could be made into cord or rope.
  • Tools would be cannibalised from various objects, razor blades, paper clips and utensils could be used to form weapons or climbing gear.
  • Strings, twine, wool and threads would be very useful...

Tuesday, 30 September 2008

In The Beginning

Project is now officially started.


This project is to be treated as an exercise into hard edge model making and material creativity with a possibility of some sculptural depending on objects chosen. There will be a brief design aspect, the majority being the specific reasons behind the collection of objects and their need to be together.


This could also include the production of random objects. Or tools and devices required for efficient urban living, made from objects found in and around the home.

  • Research areas could include


-Design Specifics

  • Survival equipment.
  • Climbing equipment.
  • Household materials, and their properties once scale up. (I.e. Normal clothe would not bend or move the same for a borrower and would perhaps to be heavy).
  • Useful items, such as keys, safety pins or needles.
  • Construction techniques, use of weaving, gluing, material workmanship ect in the borrowers scale.


-Aesthetic and physical properties

  • Project restrictions, are props to mimic the acutely theoretical weight making a key feel allot heavier.
  • How simple objects will look when scaled up, imperfections and colour variations will appear more prominent.
  • Finishing techniques, will objects be made from actual materials or art worked to look like it? Will depend of cost and weight

-Things to consider

  • Time constraints, what’s better one great item or a series of good ones?
  • Will props be working or pure representation?
  • Where and why these prop would be used in the film industry?
  • Safety Issues, some object may contain sharp or pointed edges, will these need to be removed or produced in safer materials?