Showing posts with label key. Show all posts

Wednesday, 5 November 2008

Moulding The Key Part 3

Removing the wall


The styrene base was removed and all the clay cleaned away. At this stage I noticed a small flaws.

The pour hole is partly fibre glass, and I will be pouring resin with metal powder into this.
----> Solution, I will only be pouring to top up the mould, and with a huge amount of release agent it shouldn't be a problem. Also a quick paint of silicone might be possible.

More Silicone


Another clay wall to hold the second side of the silicone, this was then backed up with 2 layers of fibre glass. Will be de moulded tomorrow, the current weather being rather could has mean the fibre glass is catalysing more slowly. This has slowed down the moulding process but will be very useful when it come to casting from it.

L.E.D materials

Received Transil 40 and optic clear 31 from mould life, this means the LED can now be moulded.

-Just ordered the TRIA inks required, with luck resin tests should be possible by Monday......perhaps even a finished LED....

Sunday, 26 October 2008

Key Mould


Purpose
The key will be cast in metal powder with resin, it will consist of two parts and a small poor hole. With the quantities of metal powder I wish to use it will make the resins to viscous to poor, but with an open mould it can be brushed into key area's. Once near full the mould will be closed then topped up via the poor hole to ensure it is free of air voids.

1) Using a sheet of plastic (laser cut to shape) with locators added will be placed around the edge at the highest point where a split line can easily be removed. A clay wall will be added with various keys cut so it can locate to the fibre glass later. Silicone will be poured over to a thickness of 10mm, when near catalysed long cube like locator will be added to prevent the mould wall sinking in later.

2) Once fully catalysed clay wall is removed and fibre glass (or mod rock) jacket is added to strengthen the mould.

3) Mould is then flipped over and all plastic and excess material removed. New clay wall is made with keys and locators. A small object is added which will layer become the poor hole. Poor second half of silicone.

4) Remove all clay, and added the second half of the fibre glass jacket, remembering to added adequate release agent where fibre glass touches. Once catalysed drill holes for M6 bolt every 30mm around the edge.

Top image shows how the mould will look when open.
Detail shows how top locators will be pinned with metal rod to prevent the wall from sinking. This is an overly cautious method, but it will insure the surface of the key will not be warped when mould is moved.

Saturday, 11 October 2008

Filling and Damage

Filling the key


The last few days have been spent continuing the designs of the back pack, and filling in the key. Once up to a near perfect standard the process of ageing will begin.

Time to age


Using enlarged photographs of the original unseen scratches and scrapes were revealed. This was then divided into a grid and sketched onto the model.
-Next I will be dremmling out these area's to mimic the keys used appearance.

Tuesday, 7 October 2008

The 'Key' Thing

KEY

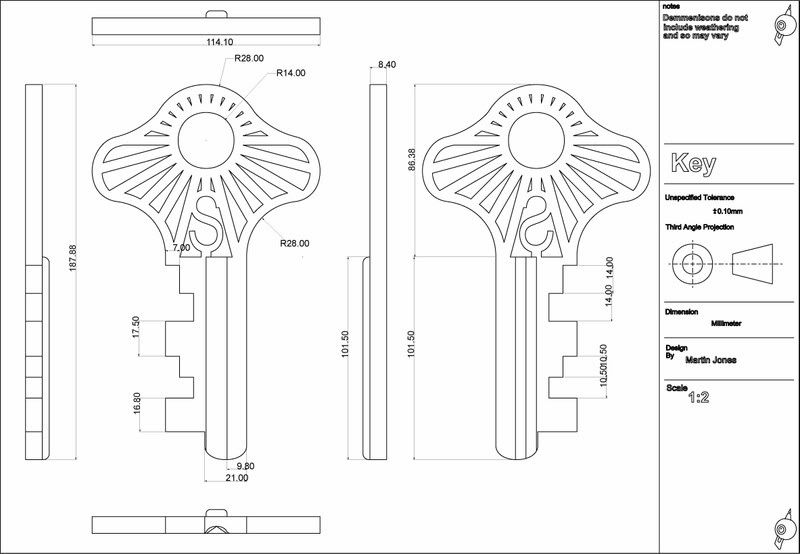
Today I began making the shape for the 14/1 scale key.


Made from various layers of laser cut acrylic, now begins the time consuming part of adding the imperfections. Using blown up photo's of the original I will try to add all the marks of age to this copy.